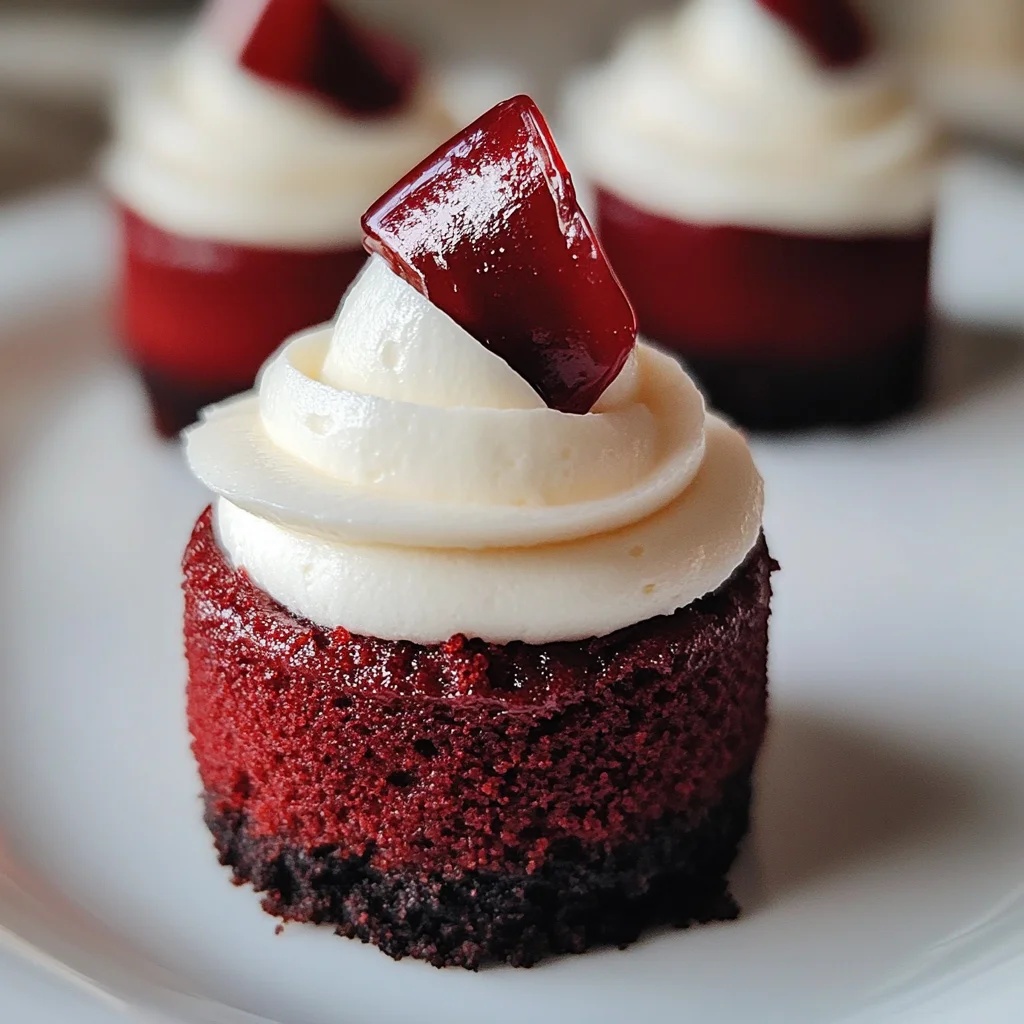
Mini Red Velvet Cheesecake
If you’re looking for a dessert that’s as cute as it is delicious, you’ve come to the right place! These Mini Red Velvet Cheesecakes are a delightful treat that will warm your heart and satisfy your cravings. They’re perfect for any occasion, from busy weeknights when you want a sweet pick-me-up to family gatherings where you want to impress everyone with something special. Plus, who can resist the vibrant red color and creamy frosting? Trust me, once you try this recipe, it will become a cherished favorite in your home!
Why You’ll Love This Recipe
- Easy to prepare: This mini cheesecake recipe requires minimal effort, making it perfect for both beginners and experienced bakers.
- Family-friendly appeal: Kids and adults alike will adore these bite-sized treats, bringing smiles all around the table.
- Make-ahead convenience: Prepare them ahead of time and store in the fridge; they taste even better after chilling!
- Delicious flavor: The combination of rich cocoa and creamy cream cheese frosting is simply irresistible.
Ingredients You’ll Need
Gathering the ingredients for these Mini Red Velvet Cheesecakes is a breeze! You’ll find that they consist of simple, wholesome items that you might already have in your pantry. Here’s what you need:
- 1 box red velvet cake mix (15.25 oz)
- 16 oz cream cheese (full-fat, softened)
- 1 cup granulated sugar
- 2 large eggs (room temperature)
- 2 tsp pure vanilla extract
- 1/4 cup unsalted butter (melted)
- 1 cup graham cracker crumbs
- 1/2 cup heavy cream (for frosting)
Variations
One of the best things about this recipe is its flexibility! Feel free to get creative with different flavors or toppings. Here are some fun ideas to switch things up:
- Add some zest: Include a teaspoon of lemon or orange zest in the batter for a refreshing citrus twist.
- Top with fruit: Fresh berries or sliced bananas on top can add a pop of color and flavor.
- Try different crusts: Swap out graham crackers for crushed Oreos or nuts for a unique base.
- Experiment with frosting: Instead of heavy cream, try whipped coconut cream for a dairy-free option.
How to Make Mini Red Velvet Cheesecake
Step 1: Preheat Your Oven
First things first—set your oven to preheat at 350°F (175°C). This ensures that your cheesecakes will bake evenly and come out perfectly fluffy!
Step 2: Prepare the Crust
In a bowl, combine the graham cracker crumbs with melted butter. Press this mixture into each cupcake liner in your muffin tin. This crust adds a wonderful crunch and complements the creamy filling beautifully.
Step 3: Mix the Cream Cheese Filling
In another bowl, beat together the softened cream cheese and sugar until smooth. Gradually add in the eggs one at a time, mixing well after each addition. Finally, stir in the pure vanilla extract. This step is key because it creates the rich and velvety filling that everyone loves.
Step 4: Fold in Red Velvet Cake Mix
Gently fold in the red velvet cake mix until just combined. Be careful not to overmix; we want those luscious layers to shine through!
Step 5: Fill Your Muffin Tin
Spoon the cheesecake batter into each muffin tin about two-thirds full. This allows room for them to rise while baking without overflowing.
Step 6: Bake to Perfection
Bake your mini cheesecakes for about 20-25 minutes or until the edges are set but centers are slightly jiggly. Allow them to cool completely before refrigerating for at least two hours. Chilling helps enhance their flavor and texture!
Now you’re ready to enjoy these delightful Mini Red Velvet Cheesecakes! They’re sure to become a favorite among friends and family alike. Happy baking!
Pro Tips for Making Mini Red Velvet Cheesecake
Making mini red velvet cheesecakes is a delightful journey, and with a few expert tips, you can ensure they turn out perfectly every time!
-
Use room temperature ingredients: This helps to create a smooth batter by ensuring everything blends together seamlessly, preventing lumps in your cheesecake.
-
Don’t overmix the batter: Overmixing can incorporate too much air, causing your cheesecakes to crack during baking. Mix just until combined for that perfect texture.
-
Check for doneness carefully: Since ovens can vary, keep an eye on your cheesecakes. They should be set around the edges but still slightly jiggly in the middle when done.
-
Chill before serving: Allowing the cheesecakes to cool completely and refrigerating them for at least two hours helps them firm up, making them easier to slice and enhancing their flavors.
-
Experiment with flavors: Feel free to add a pinch of cocoa powder or a splash of almond extract to the batter for an extra flavor boost that complements the red velvet beautifully.
How to Serve Mini Red Velvet Cheesecake
These mini red velvet cheesecakes look as good as they taste! Here are some fun ideas on how to present them beautifully at your next gathering.
Garnishes
- Whipped cream: A dollop of homemade whipped cream adds a light and airy touch that balances the richness of the cheesecake.
- Chocolate shavings: Sprinkle some dark chocolate shavings on top for an elegant finish that enhances both flavor and presentation.
- Fresh berries: A few raspberries or strawberries not only add vibrant color but also a fresh burst of flavor that pairs beautifully with the rich cheesecakes.
Side Dishes
- Fresh fruit salad: A colorful mix of seasonal fruits provides a refreshing contrast to the creamy cheesecakes and keeps things light.
- Coffee or tea: Serving these desserts alongside a warm cup of coffee or herbal tea creates a cozy atmosphere and complements the flavors of the cheesecake.
- Vanilla ice cream: For an indulgent treat, pair mini red velvet cheesecakes with a scoop of vanilla ice cream. The cold creaminess contrasts wonderfully with the rich cheesecake.
- Chocolate-covered pretzels: Their salty crunch offers a delightful textural contrast, making each bite even more enjoyable.
Feel free to mix and match these garnishes and sides based on your preferences and occasion! Enjoy creating sweet memories with your mini red velvet cheesecakes.

Make Ahead and Storage
These mini red velvet cheesecakes are not only delightful but also perfect for meal prep! You can whip up a batch in advance, making them an ideal treat for parties or special occasions. Here’s how to store and enjoy them later.
Storing Leftovers
- Store any leftovers in an airtight container in the refrigerator.
- They will keep well for up to 3 days, maintaining their creamy texture and flavor.
Freezing
- To freeze, place the mini cheesecakes on a baking sheet and freeze until solid.
- Once frozen, transfer them to a freezer-safe bag or container. They can be stored for up to 2 months.
Reheating
- For the best taste, allow frozen cheesecakes to thaw in the refrigerator overnight before serving.
- If you prefer them slightly warm, you can microwave each cheesecake for about 10-15 seconds.
FAQs
Here are some common questions about making mini red velvet cheesecakes!
Can I make mini red velvet cheesecake without cream cheese?
While cream cheese is essential for the classic taste, you can use dairy-free cream cheese alternatives if you’re looking for a non-dairy option.
How should I serve mini red velvet cheesecake?
Mini red velvet cheesecakes are perfect as is or topped with whipped cream or fresh berries. They make a stunning presentation at any gathering!
What makes this mini red velvet cheesecake recipe special?
This recipe combines rich cocoa flavor with creamy frosting, creating a delicious balance that’s sure to impress your guests while being easy to make!
Final Thoughts
I hope you find joy in making these mini red velvet cheesecakes! Their rich flavor and beautiful presentation are bound to brighten any occasion. Feel free to experiment with toppings or share them with friends and family. Happy baking, and enjoy every bite of these delightful treats!
Mini Red Velvet Cheesecake
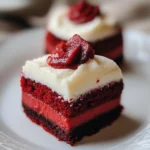
Indulge in the delightful charm of Mini Red Velvet Cheesecakes, where rich cocoa flavor meets creamy frosting in bite-sized perfection. These adorable treats are ideal for any occasion, whether you’re looking to impress guests at a gathering or simply satisfy your cravings on a cozy night in. With their vibrant red hue and smooth texture, these cheesecakes are as visually appealing as they are delicious. Easy to prepare and perfect for sharing, they will quickly become a favorite in your dessert repertoire. Enjoy the fun of baking with family and friends as you create these mini masterpieces that everyone will love!
- Prep Time: 15 minutes
- Cook Time: 25 minutes
- Total Time: 40 minutes
- Yield: Approximately 12 servings 1x
- Category: Dessert
- Method: Baking
- Cuisine: American
Ingredients
- 1 box red velvet cake mix (15.25 oz)
- 16 oz cream cheese (full-fat, softened)
- 1 cup granulated sugar
- 2 large eggs (room temperature)
- 2 tsp pure vanilla extract
- 1/4 cup unsalted butter (melted)
- 1 cup graham cracker crumbs
- 1/2 cup heavy cream (for frosting)
Instructions
- Preheat your oven to 350°F (175°C).
- Combine graham cracker crumbs and melted butter in a bowl, then press into muffin tin liners to form the crust.
- In another bowl, beat cream cheese and sugar until smooth; add eggs one at a time and stir in vanilla.
- Fold in red velvet cake mix gently until just combined.
- Spoon batter into muffin tins about two-thirds full.
- Bake for 20-25 minutes until edges are set but centers jiggle slightly. Cool completely before refrigerating for at least two hours.
Nutrition
- Serving Size: 1 serving
- Calories: 150
- Sugar: 12g
- Sodium: 140mg
- Fat: 9g
- Saturated Fat: 5g
- Unsaturated Fat: 3g
- Trans Fat: 0g
- Carbohydrates: 14g
- Fiber: <1g
- Protein: 2g
- Cholesterol: 40mg